Church newsletters often include copy from a number of contributors, like the pastor, youth director, and volunteers. Likely, they send all that copy in Word documents. And if you design the newsletter in Adobe InDesign, well, then you probably already know Word and InDesign aren’t besties.
If the process of moving from Word to InDesign for your church newsletter is a regular headache, try using styles to streamline your workflow. With styles, the original writer can easily avoid creating formatting quirks in the first place.
Improve Your Workflow
When I worked in the editorial department at Concordia Publishing House, I helped prepare documents from outside authors for the internal editing and design process. Word docs are often full of weird, hidden formatting issues. I removed any formatting issues in Word documents and worked with authors to help them submit cleaner documents.
Magically moving copy between the two programs is mostly about prep work. Once you’ve taken the time to define a style sheet and create templates in both Word and InDesign, flowing new documents will seem like a breeze!
Define Your Style Sheet
If you’re new to styles in Word, check out my previous blog post on the topic.
Start by defining your style sheet. Make a list of the paragraph and character styles you need in your newsletter. Give them logical names, like “Header 1” or “Body No Indent,” so that each style is self-explanatory for your contributors.
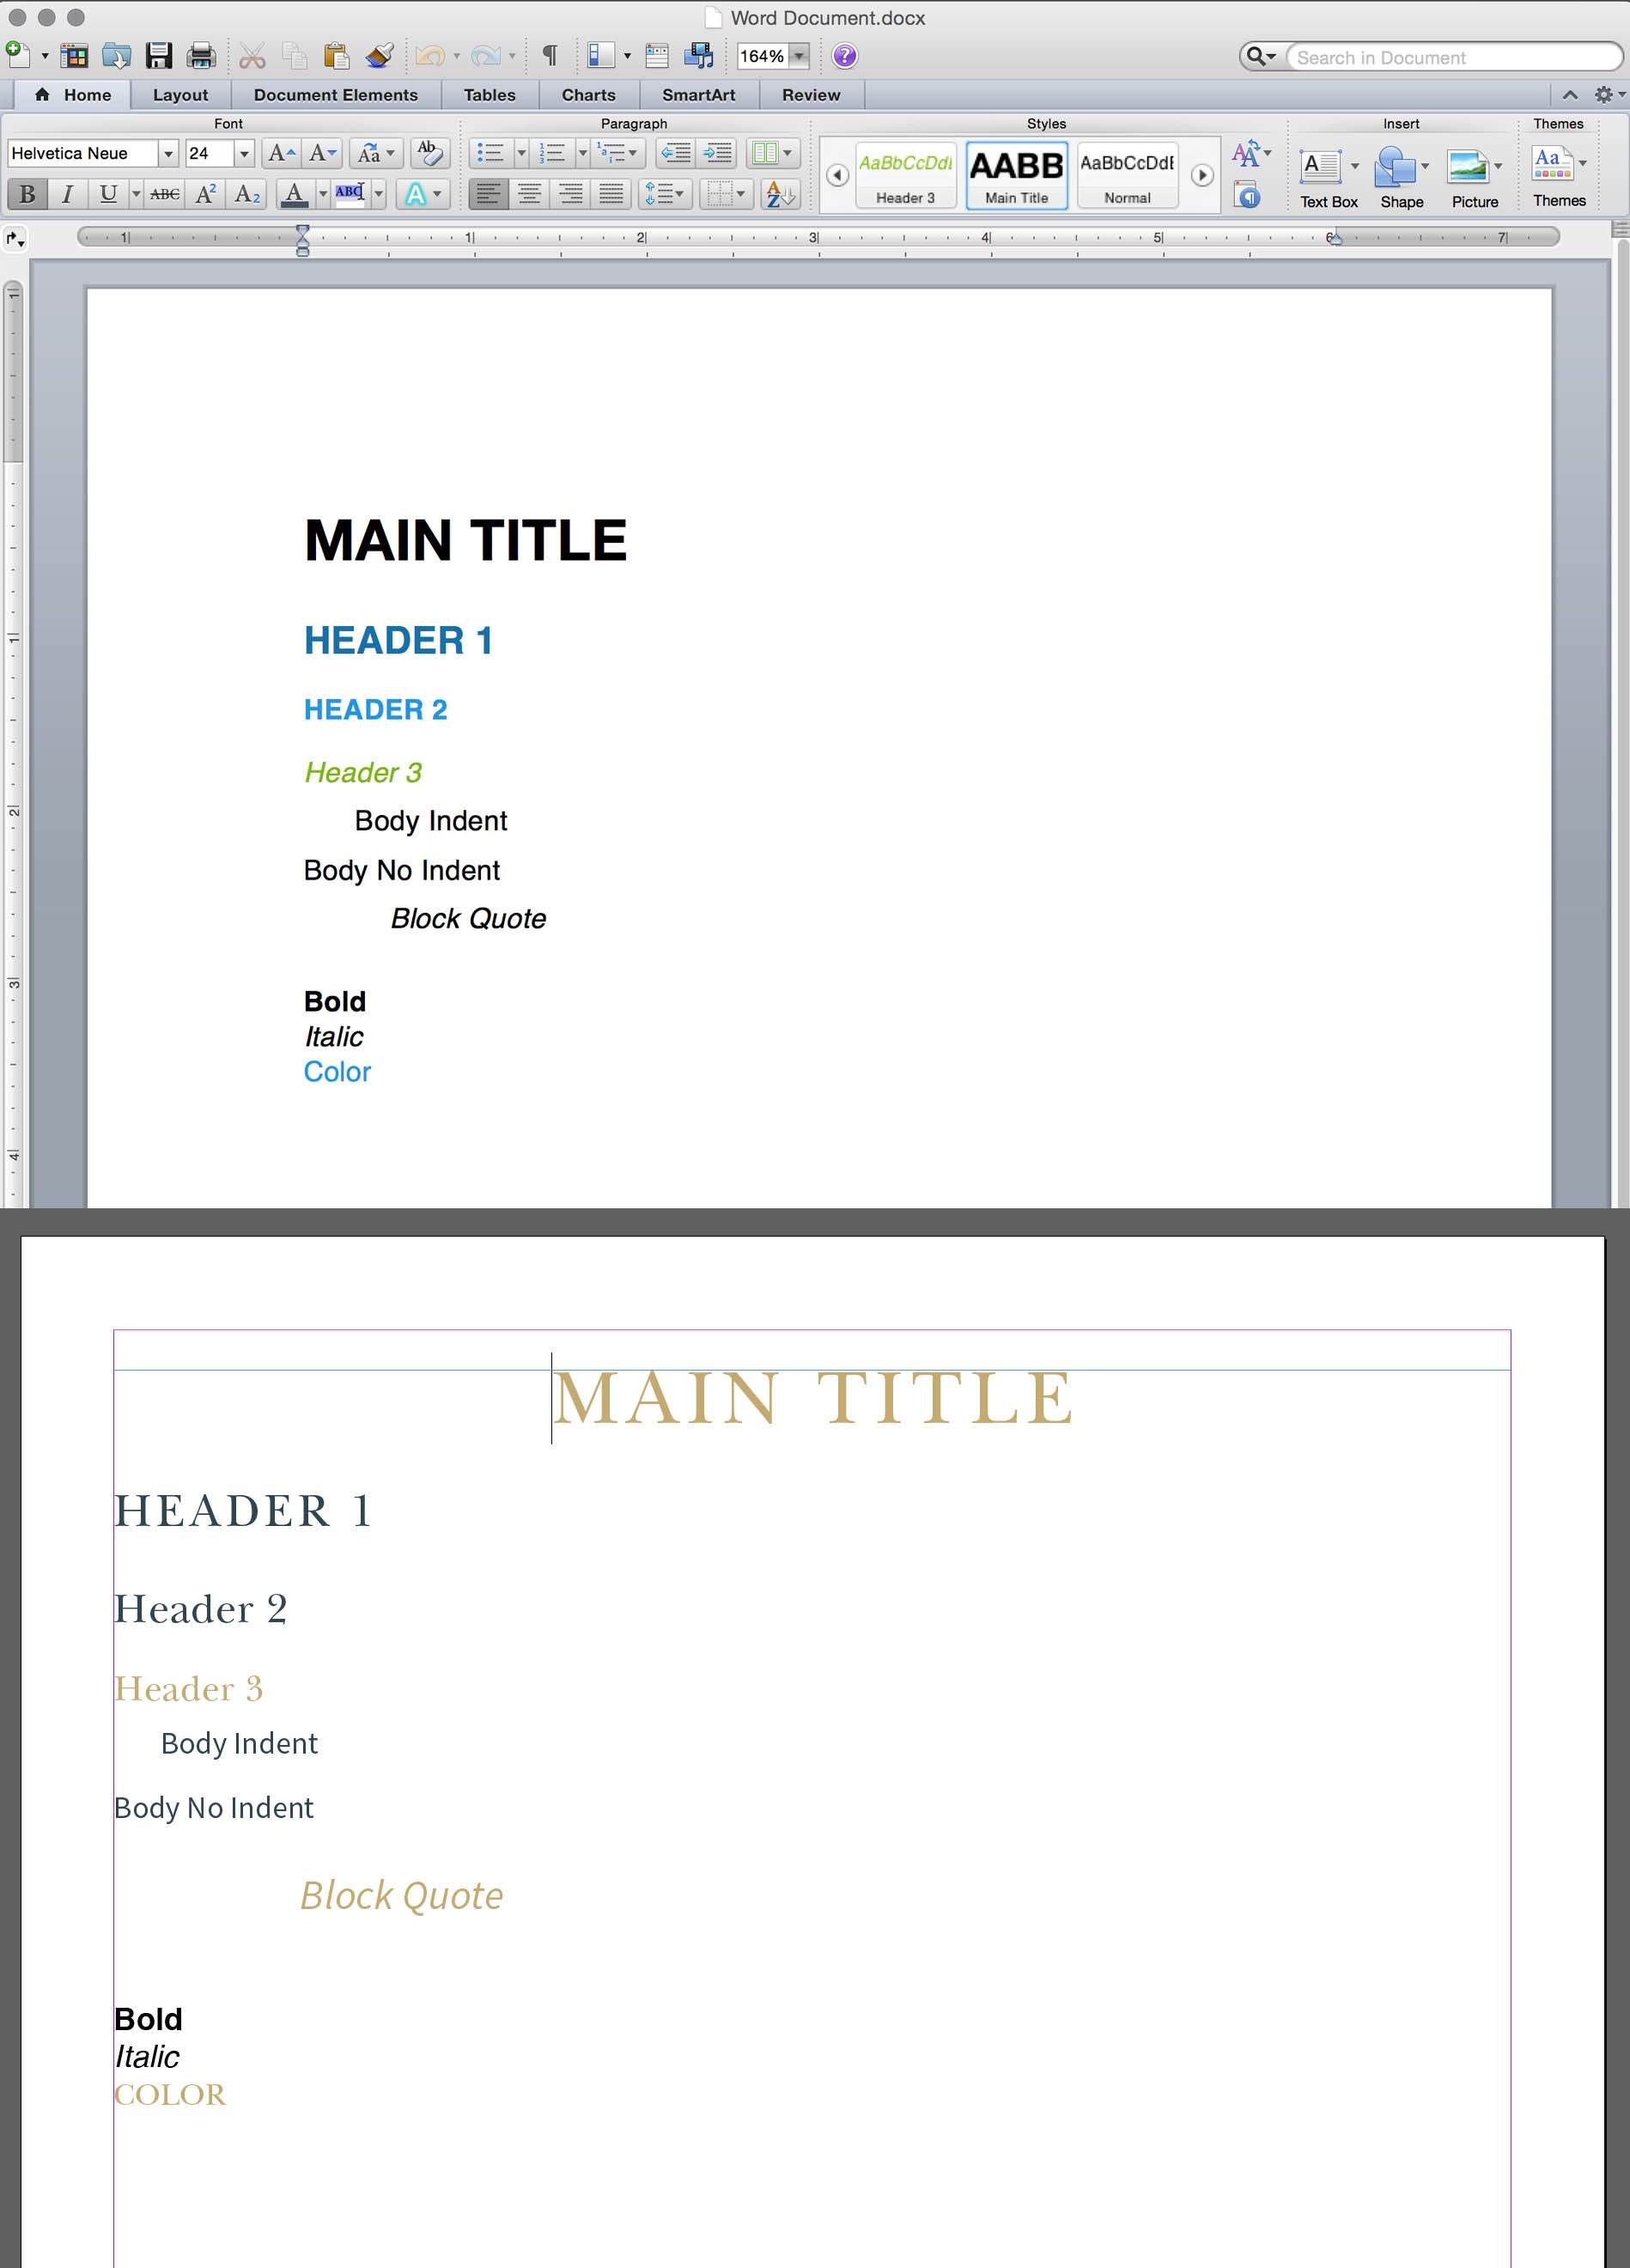
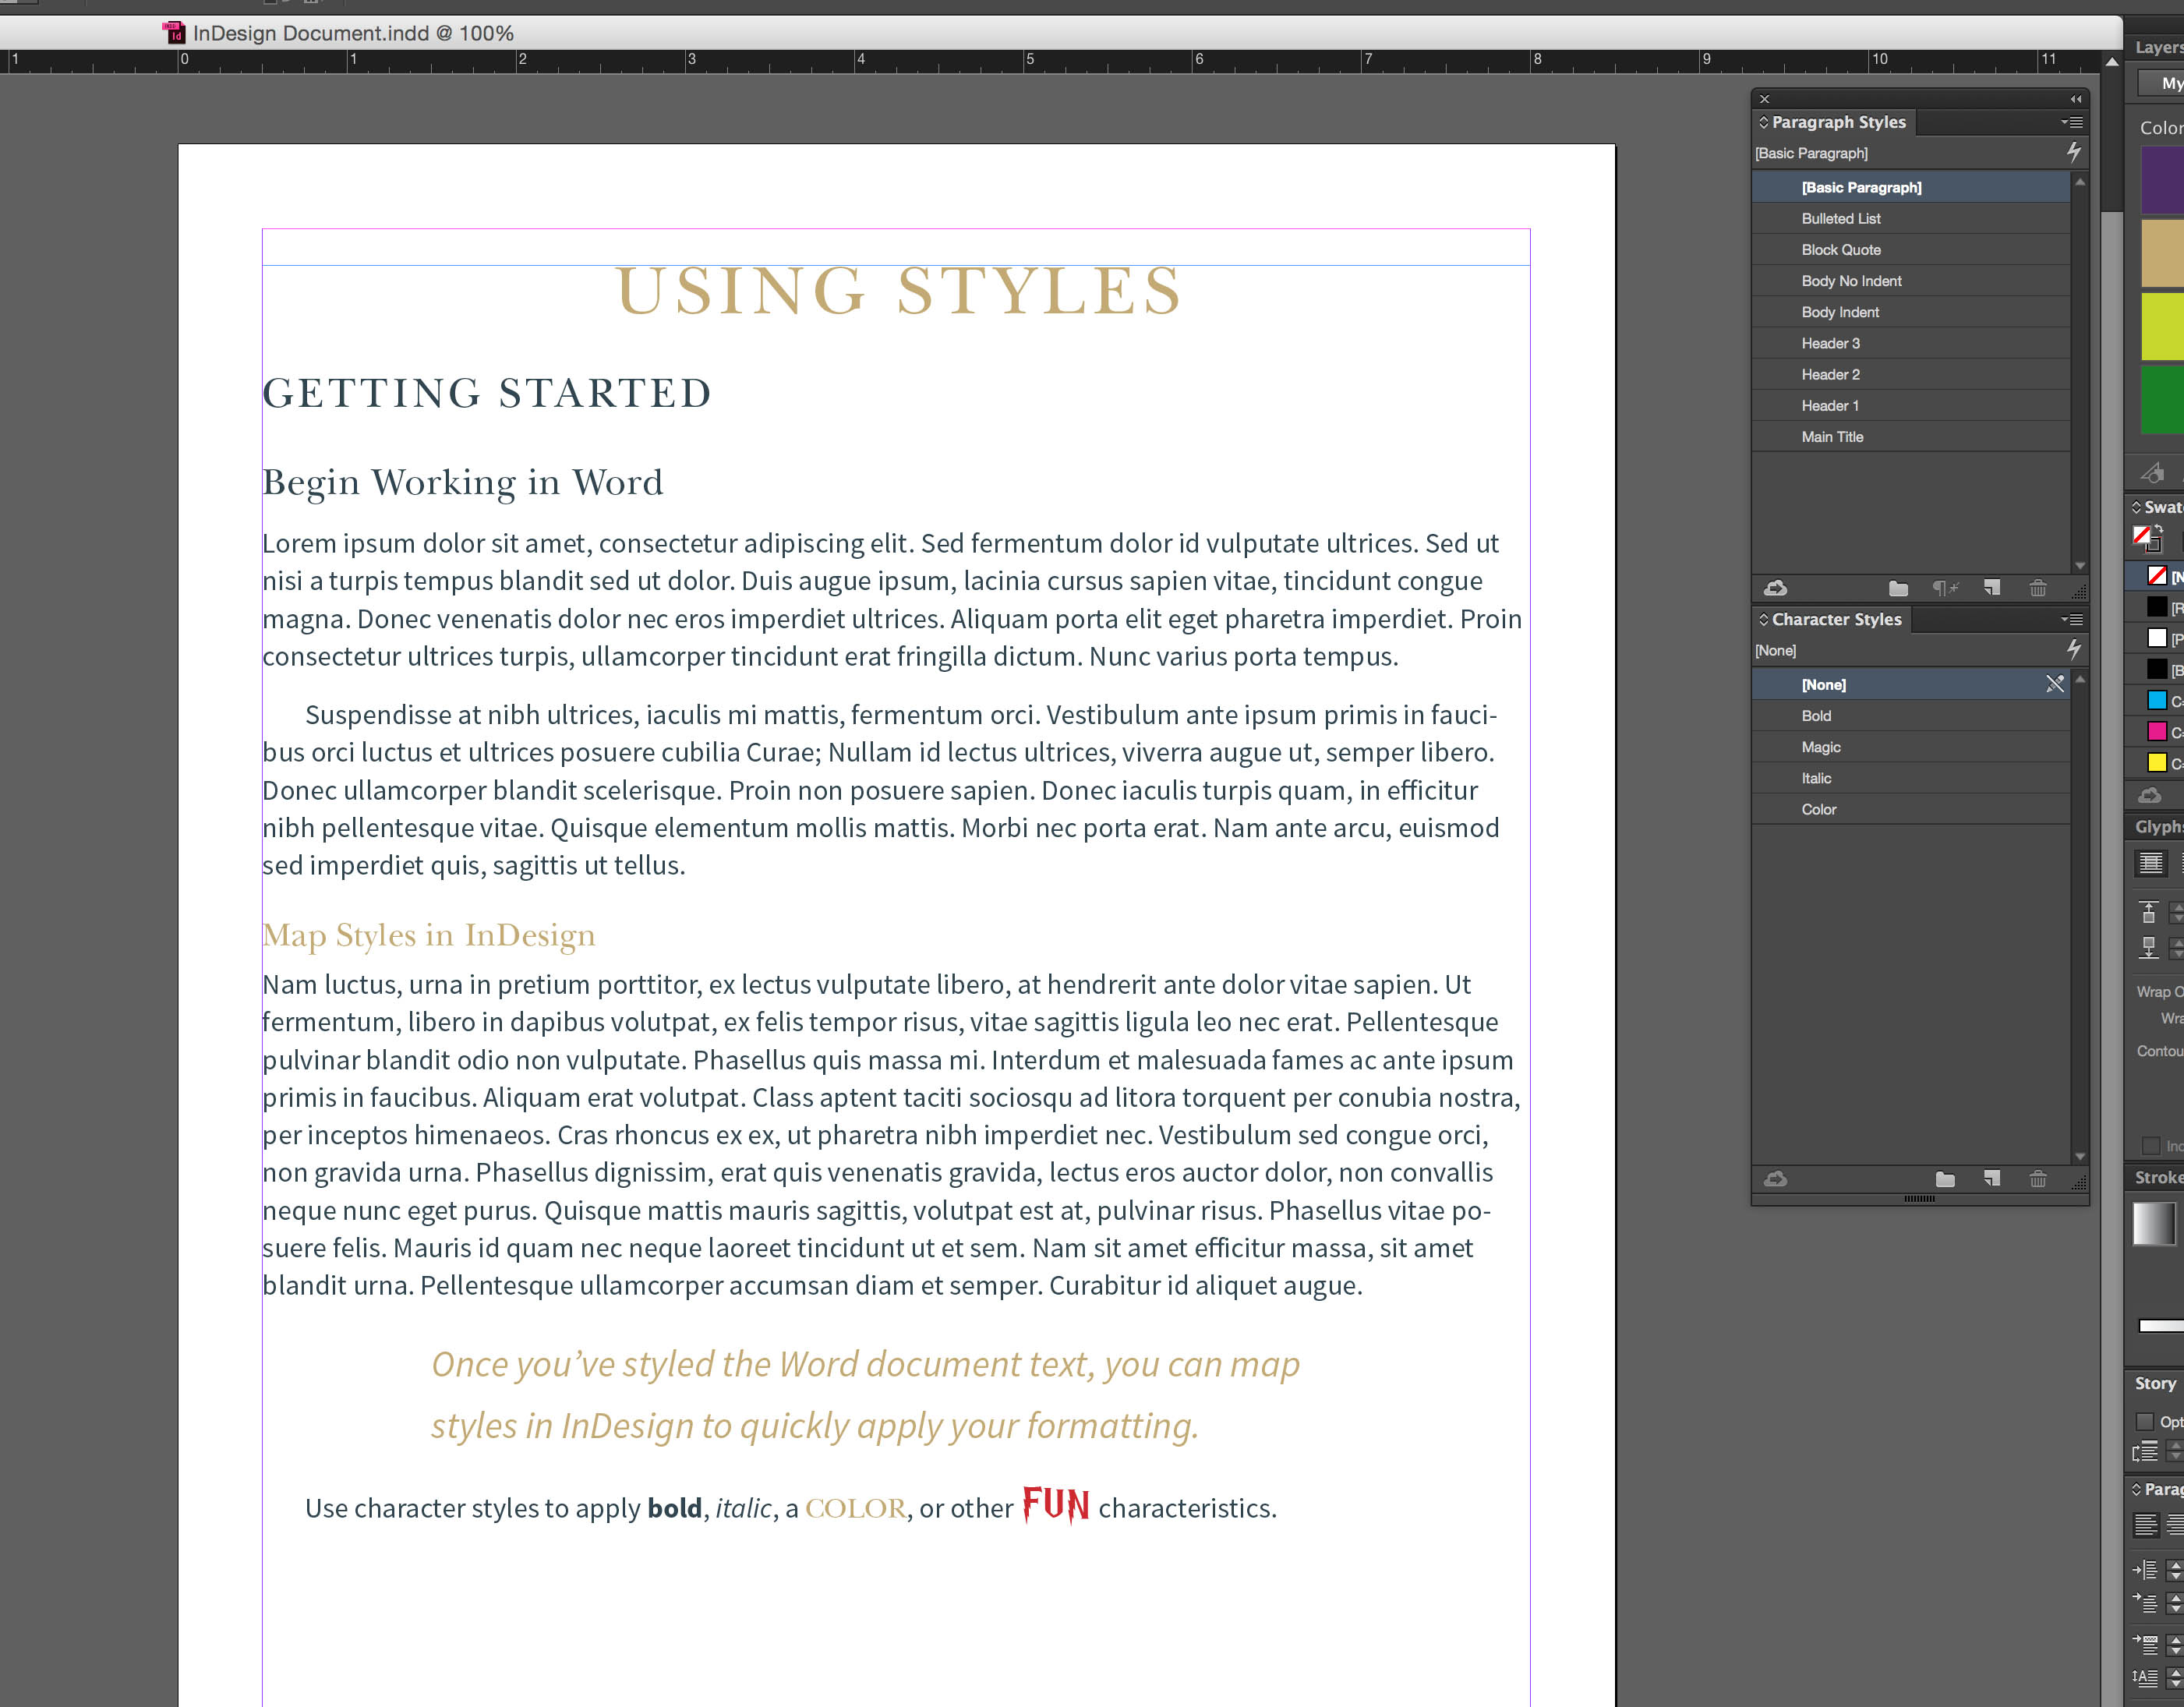
Note that whatever formatting you choose (bold, size, font, spacing, etc.) affects only the Word document. In this workflow, the name of the style is all that really matters to InDesign. Check out the example below. In Word, the paragraph style I called Header 1 could be Helvetica Neue, size 24, and black. When I imported that Word document into InDesign, it referenced only the style name, not its characteristics. When I placed the file, suddenly, that same Header 1 text became Baskerville, size 30, gold, and centered.
Create a Word Template
Next, create a Word template. Open up a new Word document and add the styles on your style sheet. Modify each style as needed so that it’s easy for your contributors to use and add placeholder text to the document to show the available styles. Include basic instructions on when to use each style.
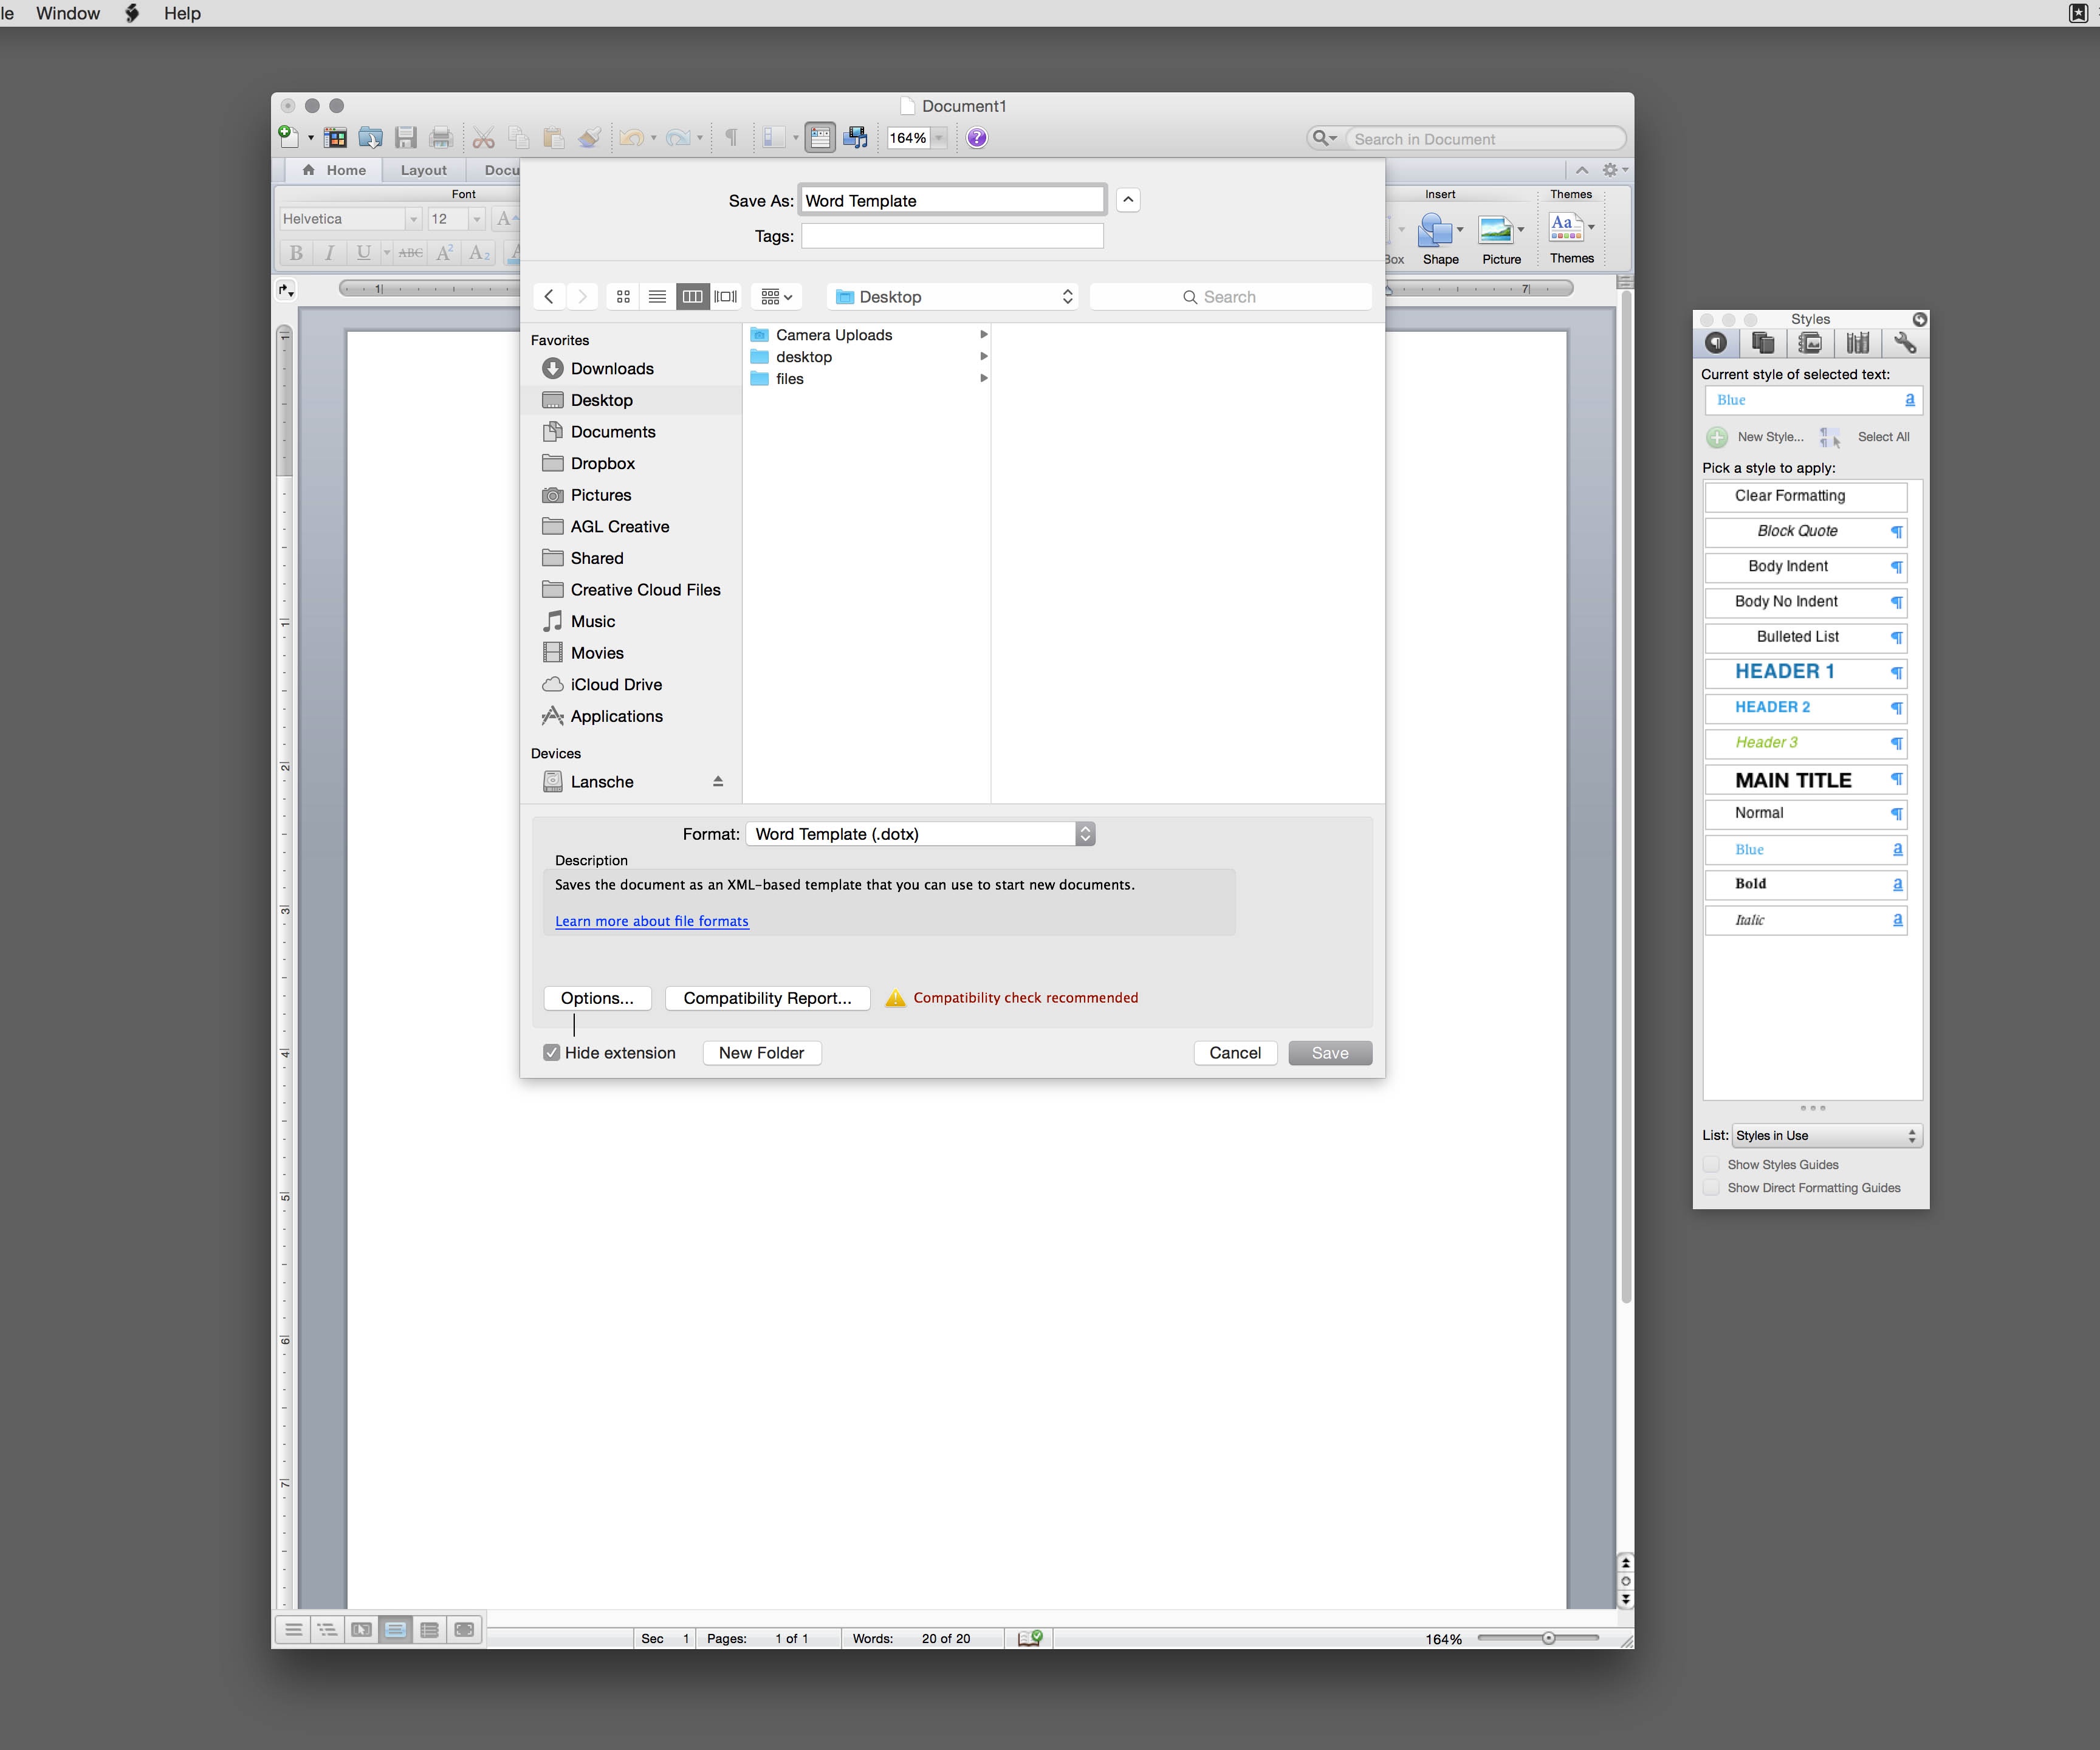
Save this document as a template (.dotx). Now, you have a few options.
- If your contributors have access to a network or cloud drive, ask them to start by simply opening the template. This will create a new document with your styles and placeholder text, so they can just start typing away!
- If not, open the template yourself and save a regular document (.docx). Send one of these documents to your contributors for every new submission.
- If they’ve already submitted copy, still use the template. Open a new document from the template, paste in their copy, and apply the appropriate styles. (This definitely takes longer for you, so aim to use option 1 or 2!)
Style Your Word Document
Before importing a Word document into InDesign, check to make sure your contributor applied the paragraph and character styles properly, rather than manually formatting the text to just match the look.
For example, if a user changes the word FUN in document shown below by using the color picker to make it purple and a key command it make it bold, that person has applied formatting overrides.

Even though the text looks right in Word, InDesign won’t know what to do with those bold, purple letters when importing. To fix this, I’ll select the word FUN and apply the “magic” character style.
Overrides are one of the biggest time killers when moving from Word to InDesign. Use the Styles window to find, select, and clear overrides. Choose Clear Formatting or apply the appropriate paragraph or character style. In the Mac version of Word, I like to select Show Styles Guides and Show Direct Formatting to help identify problems visually in the document.
Create an InDesign Template
Learn more about styles in InDesign here. Open a new InDesign document or open your existing newsletter template.
Create Paragraph and Character Styles or modify your existing style names. Make sure the name of each matches what you created in Word exactly (capitalization and spacing matter). Save this document as an InDesign template.
Import and Map Styles
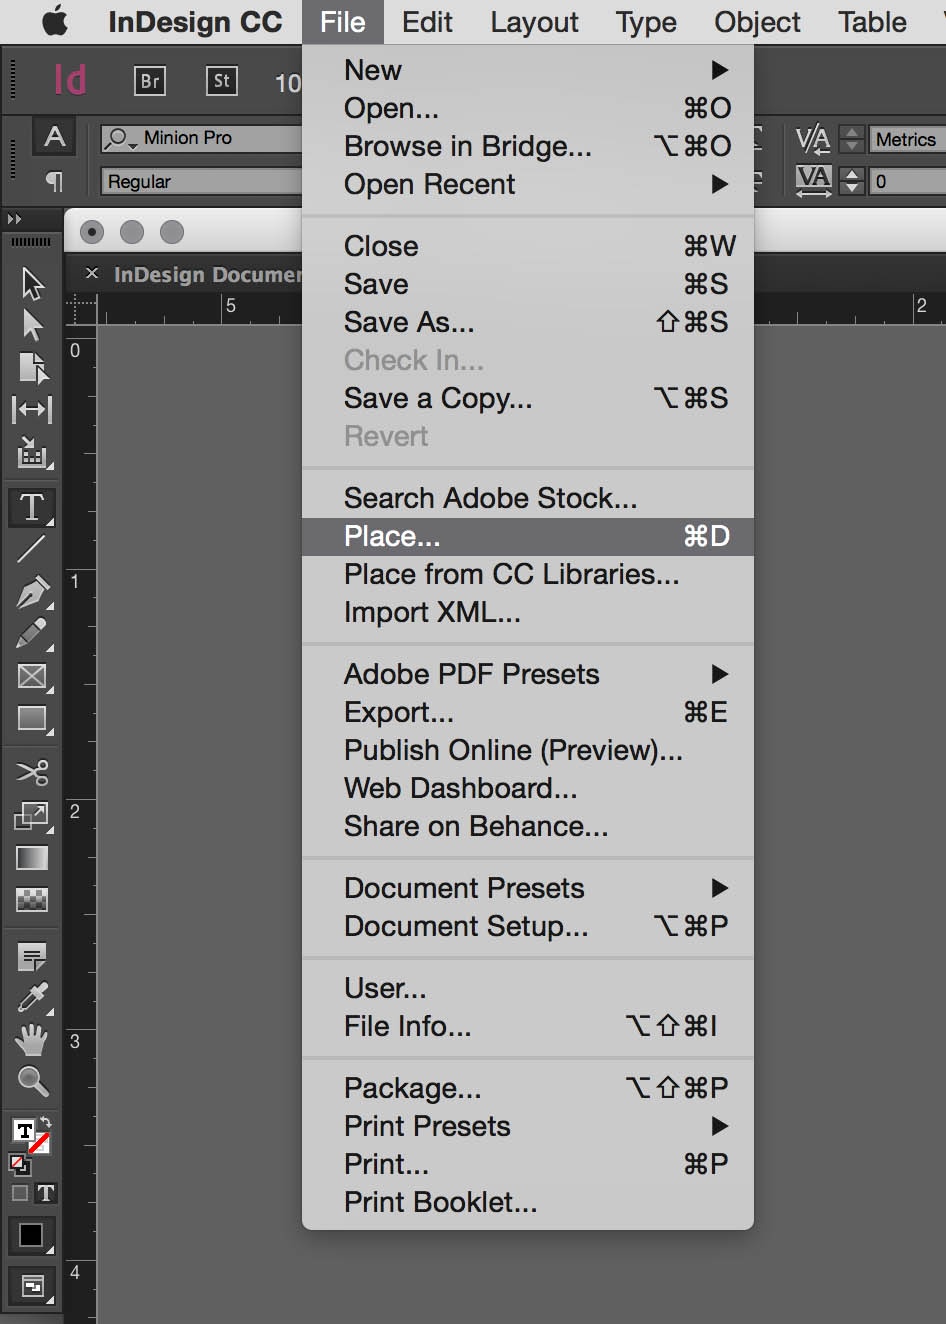
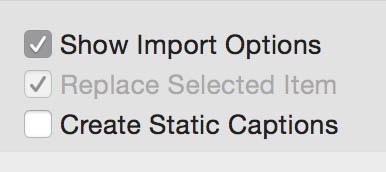
Open a new InDesign document from the template. When you place the text, check the “Show Import Options” check box.
When this dialogue box opens, choose Customize Style Import and click the Style Mapping… button.

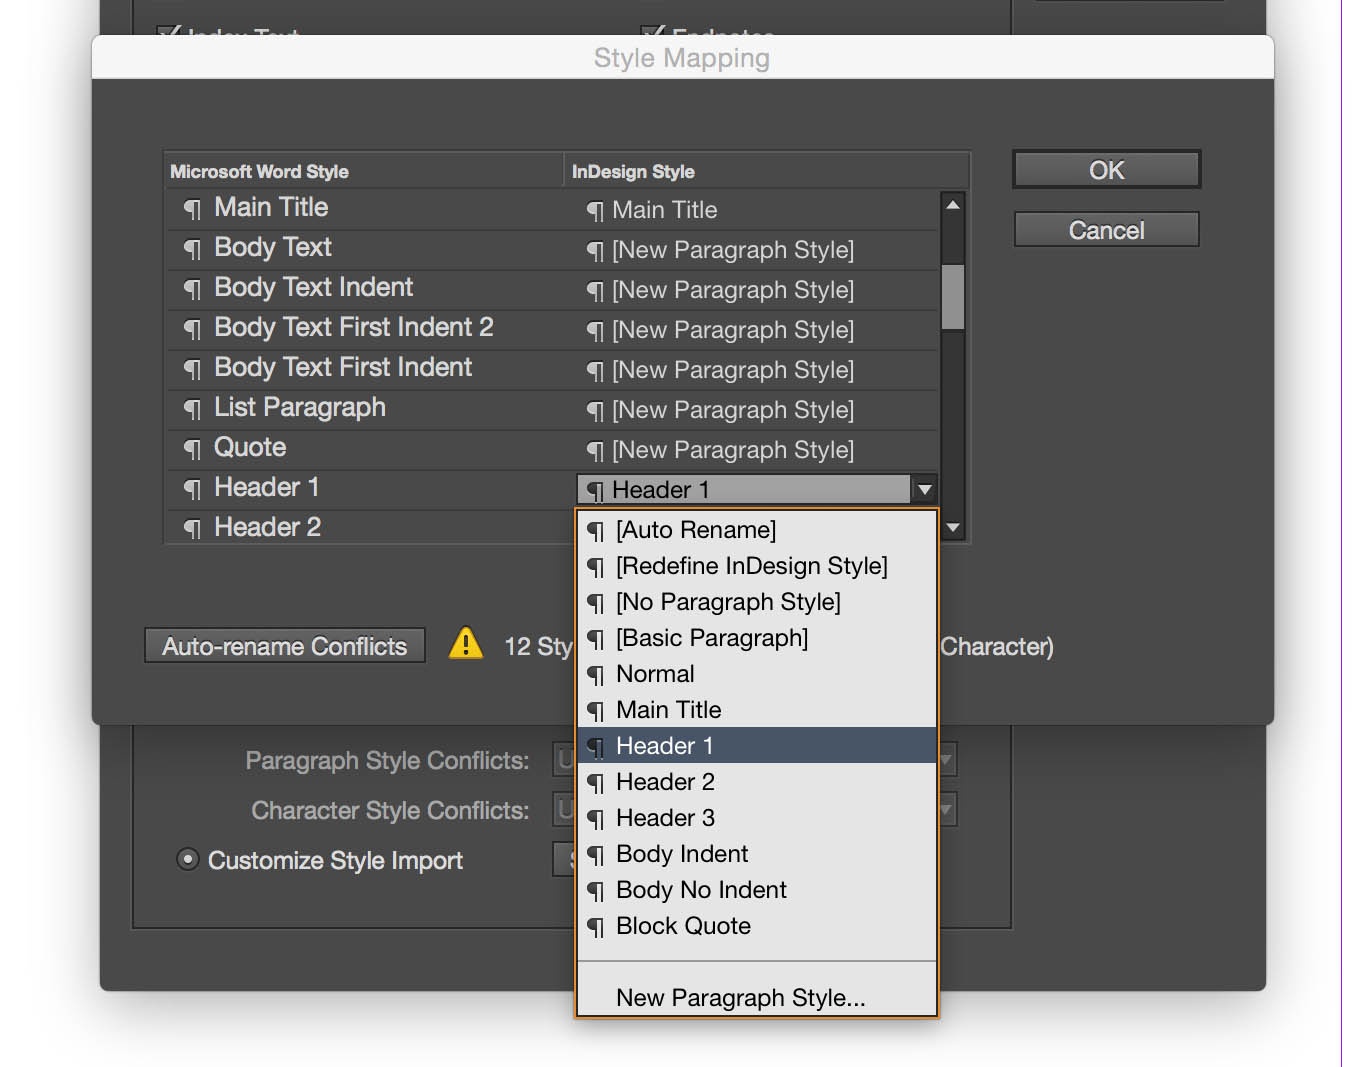
Here, you’ll make sure each InDesign style has synced up properly with those from Word. If not, choose the correct style from the drop-downs. This list will probably include some extraneous styles, but you can ignore these.
Here are two short videos that show applying styles in Word and importing to InDesign.
And that should do it!
For more advanced techniques for using Word and InDesign together, I recommend this excellent tutorial from Lynda.com.
Want to receive notifications about more content like this? Subscribe to this blog, Technology & Your Ministry.