

I love a good productivity hack. I especially love one that increases the productivity of me, my co-workers, and the people we serve. That’s why I’m a big fan of webinars for training. We can provide live trainings on a wide variety of topics, record them, and make them available for on-demand viewing.
Why should your church consider using webinars? You can offer a lot of training online, engage potential guests, offer digital Bible studies, and position your church in your community as one that is truly available to its community.
For the purpose of this blog, let’s consider church member training. Rather than devote one or two classes to facts and figures in lecture-based training sessions, record a webinar using a software like GoToWebinar. Now, rather than devoting a Sunday evening to walking future members through book learning, they can watch the recording ahead of time instead. Then you can spend “in-person” training time recapping the content, answering questions, and deepening relationships.
Here’s one way to do it.
Pick your webinar service. There are plenty of webinar solutions out there with a decent variety of features. We use GoToWebinar at the LCMS Michigan District office.
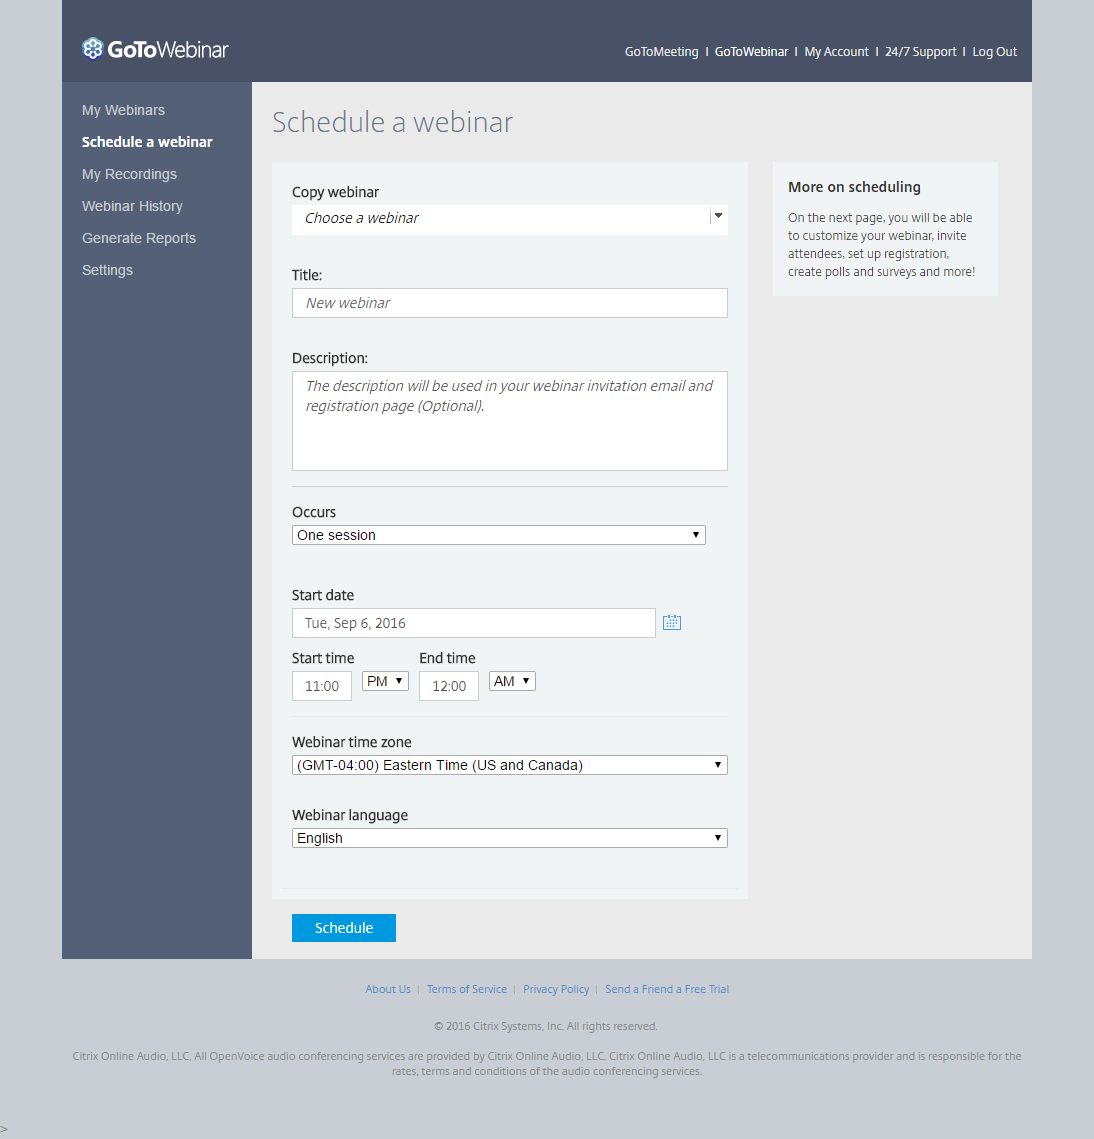
Once you set up your account, it’s relatively quick to schedule your first webinar. Choose a title, and then add your description, event frequency, start date and time, time zone, and webinar language. That’s it! You’re scheduled.
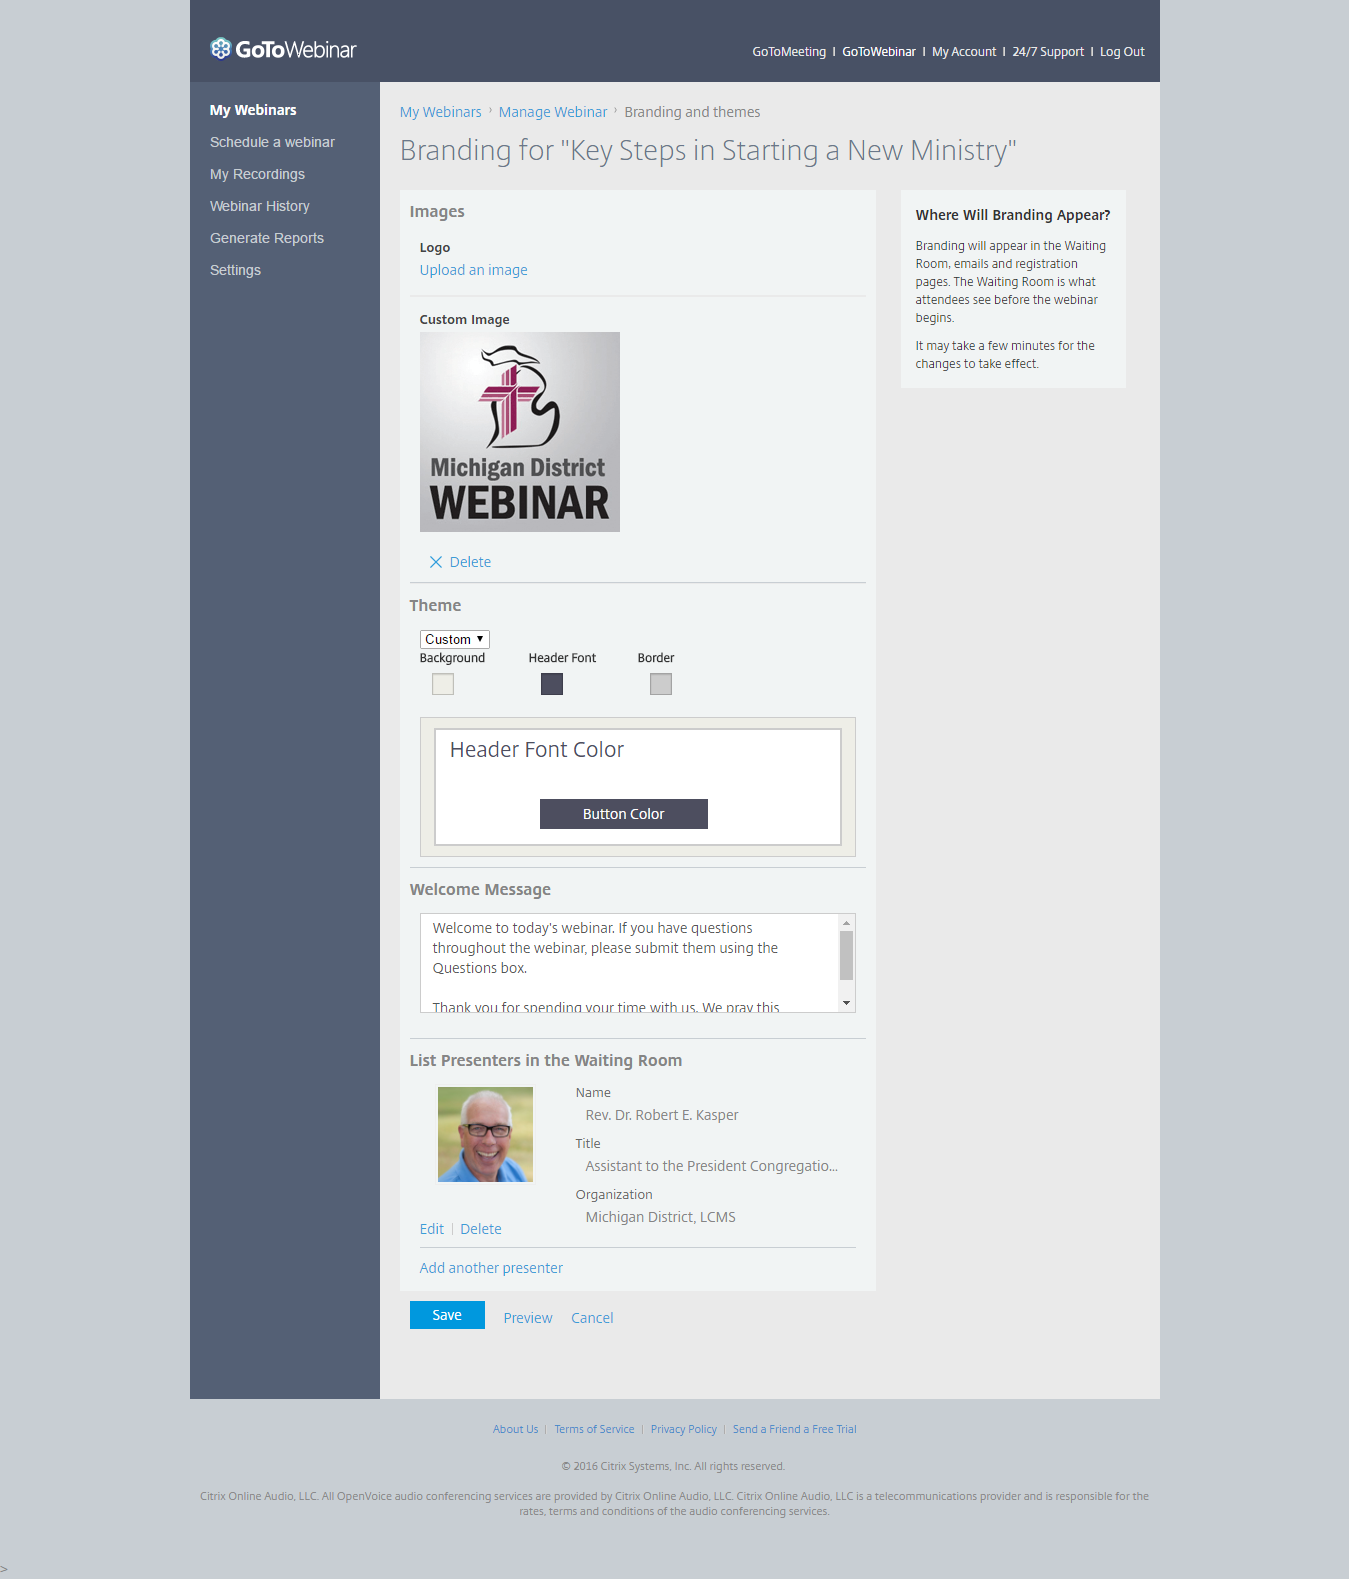
Tune Your Look in Branding and Themes
Once you schedule the basics of the webinar, you can fine-tune the specifics. Have a logo and brand colors you’d like to utilize? Set those in the “branding and themes” setting.
Set Up the Automated Emails
GoToWebinars allows you to create three types of emails that will be sent out automatically to registrants: confirmation emails to all registrants, reminder emails (up to three; e.g., one hour, one day, and one week before), and follow-up emails to both attendees and absentees. Getting these written out ahead of time puts part of your event marketing on autopilot. Spend some time getting the messages right.
Bonus Tip: In both the confirmation and reminder emails, we’ve started creating prewritten tweets with the Share Link Generator. Once they’re written, I turn that really long URL into a shortlink with our bit.ly account. I then add the shortlink to the automatic emails, and every registrant then receives an encouragement to share the webinar on Twitter quickly by just clicking the link.
How to Promote Your Webinar
- Share Your Link—When you schedule your webinar, a custom link to the event registration page is created. You can send this link anywhere: emails, social media, texts, and so on. It’ll take potential registrants straight to the sign-up page.
- Create an Event on Your Website Calendar—Add the webinar to your event calendar. Members and visitors come to your site to see what’s happening—not listing this “event” could be a missed opportunity.
- Create a Facebook Event and Invite Members and Friends—Facebook is a great way to get the word out about an upcoming event. It has built-in social activity. Invite anyone associated with your church. Share the event on your church Facebook page as well as on your personal profile. Communicate the value and start building interest early.
- Schedule Tweets—Use a tool like Hootsuite or Buffer to schedule tweets leading up to the event. Vary up the days and times of your tweets to ensure better coverage of when you believe Twitter users will actually be logged into the platform.
- Email Your List—Have an email list of members? Send out event invites with clear “Register Now” buttons as well as “Forward to a Friend” options.
Launch the Webinar
When the day arrives, you can focus on running the webinar. All the last-minute reminder emails, tweets, and link shares should be running on autopilot. I typically “start the webinar” between 20 to 30 minutes ahead of time. This opens the digital webinar room and allows attendees to begin entering a waiting area. The actual webinar does not begin until you click Start Broadcast.
Pre-broadcast is when I have a co-worker log into the webinar so I can add that person as a fellow panelist/organizer. Panelists and organizers can talk during this time without the attendees hearing their conversation. It helps me refine the audio levels for the broadcast—and ensures the equipment is actually working!
One minute prior to the scheduled broadcast, I click Start Broadcast and take care of housekeeping items: a quick welcome, a double check of audio levels for attendees listening in, direction to the Q&A process, a reminder about resources available after the webinar (including a recording of it), and then a handover to the day’s moderator/host.
Running the Webinar
There are several key tasks that an organizer should be concerned with, such as webinar pacing, equipment and technology, attendee questions, and Twitter activity.
My main concern during a webinar is the equipment and technology. Are we on the right slide? Is the sound still working? I’m always checking audio levels. I’m also logged into the webinar as an attendee on an iPad so I can hear the audio that’s going through the system. Naturally, there’s a slight lag between the live speaker sitting next to me and what’s traveling through cyberspace; it can be disorienting at first, but it’s definitely reassuring to know it’s working properly.
During the course of the webinar, not only is it important that everything is working right, but it’s also important that the presenter is staying on the topic. GoToWebinar tracks attendee interest levels, basically, “are they still listening?” If attentiveness is waning, you may want to utilize a poll (a built-in GoToWebinar feature) that allows attendees to be an active participant in the presentation by logging an answer to a quick question.
Oftentimes, we receive questions throughout the webinar. One of the responsibilities of the presenter or moderator is to determine whether the question pertains to the current topic or if the moment has passed. If it’s pertinent, we throw the question right in there: “Phil just asked a great question …” If we’ve already moved on to a new area of the conversation, that question gets logged and saved until the end of the presentation. We always stay until every question has been addressed.
We schedule our webinars for one hour, and we do our best to respect that. We have found that the best way to respect attendee time is to end the main content about 10 minutes early in order to make sure there’s time for additional questions and the natural dialogue that grows out of attendee questions. GoToWebinar allows you to give any attendee audio privileges; however, we at the Michigan District have yet to be that daring.
Once all of the questions are answered, we thank attendees for participating and remind them that they’ll receive two emails from us over the next 24–48 hours. One is a link to a webinar evaluation (set up through Constant Contact Surveys) and the other is a resources email that includes a link to the webinar recording and any other links and documents that were mentioned in the webinar.
Then we click End Webinar, and the recording begins finalizing itself. Once it’s done, I download it and pop it into Adobe Premiere to cut off the housekeeping intro and the final announcements. I export that and upload it to YouTube.
Next Steps
Archiving webinars on YouTube gives new life to the knowledge that was shared during the presentation. Now, anytime people have questions about certain subject matters, we can direct them to a growing archive of recordings.
A wonderful by-product of running and recording webinars is that we add to our efforts with each one. About once a month or so, I’ll receive a question along the lines of “Didn’t you have a webinar that covered Elder Training?” Yes, yes we did (three years ago). Here’s the link.
Building up your digital archive of resources is a great way to start conversations and build trust by providing on-demand content. When a webinar viewer has further questions, that person is more likely to trust that we’ll be able to offer help, and so the relationship is already a few steps down the road.
Best of all, using webinars saves time and money by not having to invest in lectures and workshops. We can direct individuals and groups to our digital archive and, when they’re ready, our team can step in and help customize the information and best practices to their community and context.
How About You?
Have you utilized webinars or other online education tools at your church? What are some potential uses you see for webinars?
Want to receive notifications about more content like this? Subscribe to this blog, Technology & Your Ministry.


